I spent Labor Day weekend this year up at Mom’s; helping out at the Farm 2 Fork festival in Saranac Lake, checking out the damage to the roads from “Hurricane” Irene, listening to more rain pound on the roof, and, of course, doing some cooking. (Also, drinking a few bottles of wine – one I brought home from my recent trip to Napa, and one Mom had been saving… Was that her way of bribing me to come visit more often? It may have worked…)
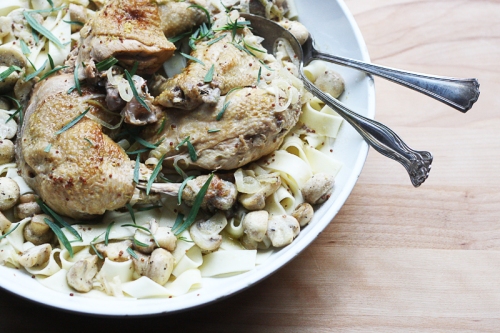
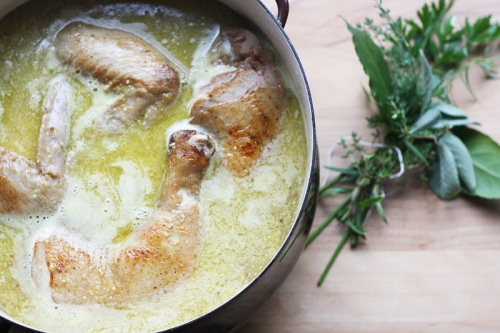
Mom made a really great Heirloom Tomato and Cornbread salad (recipe coming soon. eventually. promise.) for the festival, and it disappeared in two hours flat. Back at home we cranked out the Tomato Flatbread from my last post, a Wild Mushroom Tart (coming…), and this Braised Chicken, using a fresh whole chicken from Asgard Farm. We served this over the homemade pappardelle from the Italian deli back in Syracuse, which made a perfect bed for this dish. The sauce turned out much lighter and more summery than I expected, which was a pleasant surprise. It’s a Sunday Meal for sure, but well worth it for these in-between months of warm days and cool nights.
White Wine Braised Chicken with Button Mushrooms (serves 6, mildly adapted from Zen Can Cook)
1 Whole Chicken, quartered (or 4-6 breasts, bone-in, or thighs, legs attached)
S&P
5 Tbsp Olive Oil
6 Tbsp Butter
3-5 large Shallots, sliced
5 cloves Garlic, smashed
3 cups White Wine (I used inexpensive Pinot Grigio)
1/4 cup Tarragon Vinegar (I subbed Rice Wine vinegar – turned out fine!)
4 cups Chicken Stock
Herb Bundle – use fresh herbs such as sage, thyme, bay, parsley, tarragon
6 Tbsp Whole Grain Dijon Mustard
1 cup Cream (I used light)
2 cups Button Mushrooms, halved
1 Tbsp Olive Oil
Pasta – I suggest Pappardelle, Tagliatelle, Fettuccini
Tarragon Leaves, chopped, for topping
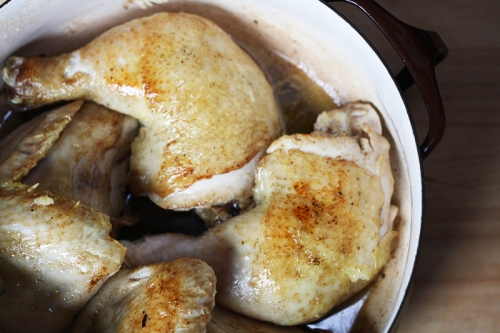
Preheat to 350. Heat 4 Tbsp olive oil and 3 Tbsp butter in a dutch oven or other heavy-bottomed, oven-safe pot. Sprinkle S&P on the chicken pieces and cook until golden brown, about 4 minutes per side. Transfer chicken to tray and set aside.
Add remaining butter and sautee shallots and garlic until translucent, about 7-8 minutes. Add vinegar and cook for a minute before adding the wine. Simmer until reduced by half. Replace the chicken in the pot, and add the mustard, chicken stock, and herb bundle. Bring to a simmer, then add the lid, and move to the oven to braise for approx 1.5 hours.
30 minutes before the chicken is done, sautee the mushrooms in the remaining 1 Tbsp olive oil and toss with S&P. Cook the pasta, drain, toss with butter (optional).
Transfer the chicken pieces to a large platter, on top of the pasta and mushrooms. Add the cream to the braising liquid and allow to thicken a bit. Pour over chicken, and top with tarragon leaves.
Filed under: pasta, supper | 3 Comments
Heirloom Tomato Flatbread
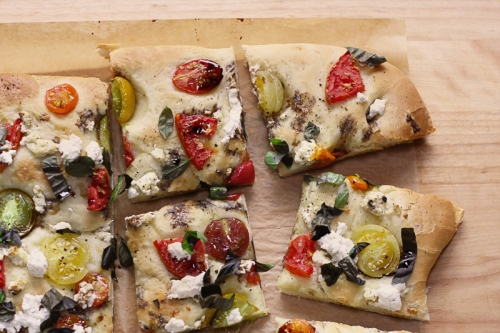
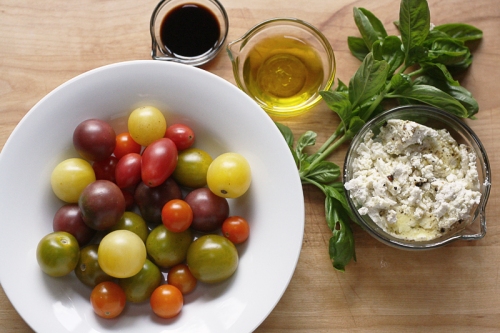
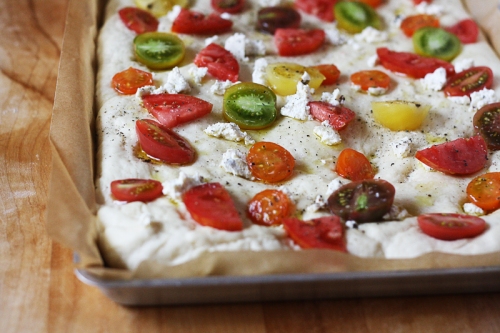
A few months ago I saw this strawberry balsamic flatbread over on Joy The Baker, and pinned it to try sometime, as it looks absolutely delicious. Unfortunately I think I waited a bit too long as fresh berries were no longer available at the farmer’s market (nor were grapes, as the original LA Times recipe called for). Instead, I decided to go a more traditional route and used heirloom tomatoes, fresh basil, and a really great olive oil and cracked pepper goat cheese. It was delicious! I’ll be trying it again next year with the strawberries, though…
Heirloom Tomato Flatbread (serves 6)
2 packets (~5 tsp) active dry yeast
1 cup warm water (between 110 and 115 degrees F)
3 cups flour, divided into 1 cup increments
3 Tbsp, plus 1 tsp olive oil
3 Tbsp sugar
1 1/4 tsp salt
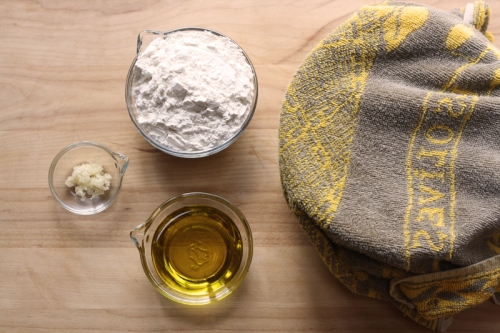
2 tsp finely grated garlic
1 cup tomatoes, sliced
coarsely ground S&P
3/4 cup goat cheese, crumbled
balsamic vinegar and good olive oil
1 Tbsp fresh basil, coarsely chopped
In a large bowl, stir the yeast into the warm water, breaking up any clumps that occur. Stir in 1 cup of flour, blend til smooth, cover, and let bubble and rise in a warm place for 1 hour.
Uncover and stir in 3 Tbsp olive oil, sugar, and garlic. Add 1 cup of flour and stir to blend. Add the final cup of flour and the salt, and use your hands to work into a dough. Knead on a lightly floured board for 5 minutes. Dough will be a touch sticky. If it’s severely sticky, feel free to add up to 1/3 cup more flour. Coat a clean large bowl with the remaining olive oil (1 tsp) and place dough inside. Roll dough around to make sure it’s coated with the olive oil and won’t stick. Cover and let rise in a warm place for 1 hour – should double in size.
Turn out dough, and punch down once or twice before rolling out into a rectangle. Roll out, pull, and push to fit a jelly roll pan (or other pan approx 15″x9″) lined with parchment. Let rise in a warm place for 30 more minutes.
Once dough is ready, preheat oven to 375, and poke a number of indents in the dough with your fingers. Fill the indents with tomatoes, cut side up, and cheese crumbles. Drizzle just a bit of olive oil over the top, and sprinkle with coarsely ground salt and pepper. Bake for 30-35 minutes or until slightly golden and firm.
Allow to cool, slice into squares, drizzle with good balsamic, and sprinkle with fresh basil. Dig in!
Filed under: finger food, snack, veggie | 1 Comment
Baked Jalepeno Poppers
I have a weird thing with Jalapeno Poppers. I love them. I order them out at restaurants whenever I get the chance, and even buy the frozen ones occasionally to heat up at home (or eat frozen, as the case may be. Shhh.) I’d made some fresh a few years ago using Fiber One as the coating and they were OK, but I wanted to try again to see if I could get results that were any better.
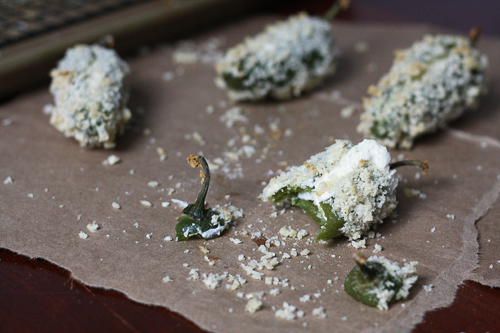
I don’t like frying things at home, so it seemed like baking them was a logical choice. I used Panko crumbs for the breading and mostly cream cheese for the stuffing — they turned out great! You could also use cheddar (or almost any other kind of cheese), or regular bread crumbs. Just a few notes: the longer you bake them the less heat you’ll have – and these will be HOT, especially if your Jalepenos are fresh and ripe. So bake ’em good. Also, as crazy as it sounds, you might consider wearing gloves while you work with these… whatever you do, DON’T TOUCHyour face (especially your eyes). To wash your hands, rinse in milk first to deactivate the oils, then scrub as usual.
Baked Jalepeno Poppers (makes 10)
10 Jalepenos
8oz Whipped Cream Cheese
1/4 cup Shredded Mozzarella
1-2 Wedges Laughing Cow Lite, herb variety (or any other soft cheese you have on hand)
1 cup Flour
3 Eggs, beaten
2 cups Panko Bread Crumbs
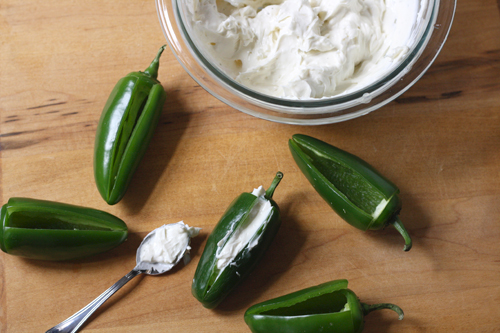
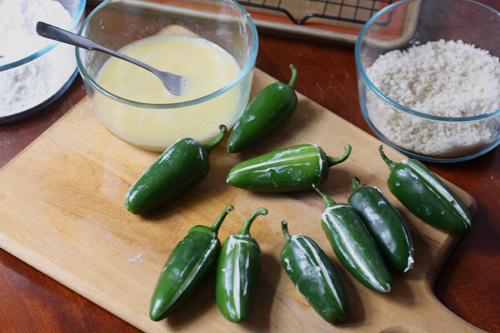
Start by making a “T” shaped slice in each Jalepeno, curling back the top corners to gain access to the seeds and veins inside. Carefully slice out the veins and scoop out the seeds, making sure to leave a very clean interior. The seeds and veins are the hottest parts of the pepper, and you want them out. Once all the peppers are prepared, mix the cheeses together and spoon into the empty Jalepenos. The cheese will hold everything together and you can re-shape the peppers back to their normal shape, using the cheese as glue. Wipe off any extra cheese that overflows the cuts.
Preheat to 375.
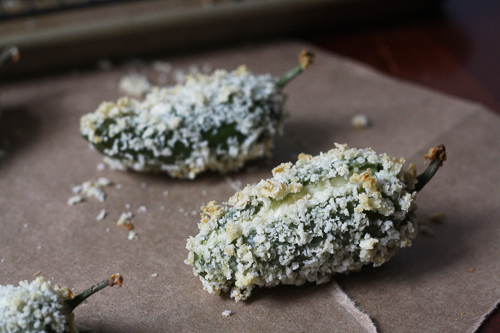
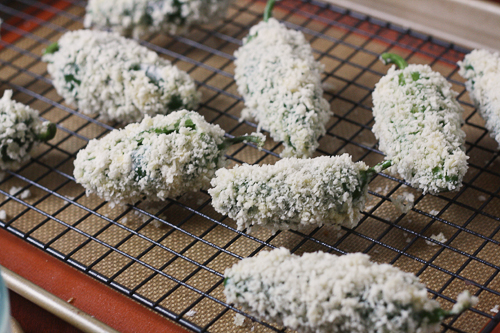
Wet the outsides using a little bit of water, then dunk in the flour, then egg wash, then panko, as if breading chicken. Repeat the egg and panko if you’d like for an extra crunchy outside.
Place gently on a baking rack on top of your baking sheet. Bake poppers for 15-25 minutes, until crumbs start to brown. Allow to cool slightly (cheese inside will be HOT). Serve immediately, with a tall glass of milk. Or beer!
Filed under: easy, few ingredients, finger food, snack, veggie | 4 Comments
Quick Toasted Coconut Scones
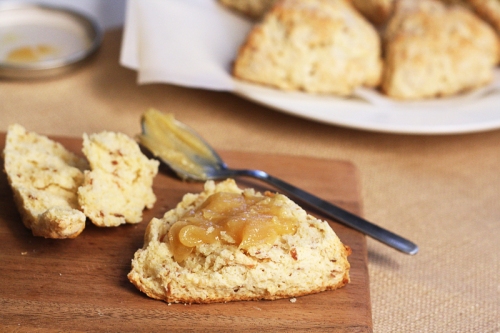
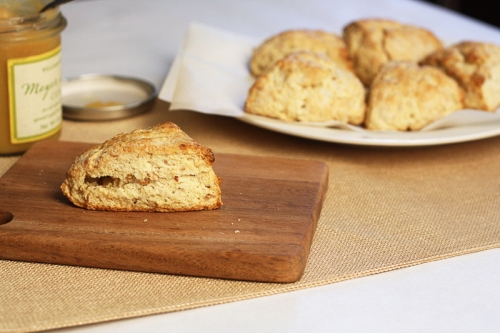
These are super quick and easy to whip up in an afternoon when you are craving something a little sweet and hot and fresh. They were the perfect vessel for the Meyer Lemon Curd that my mom got me for my birthday, as well!
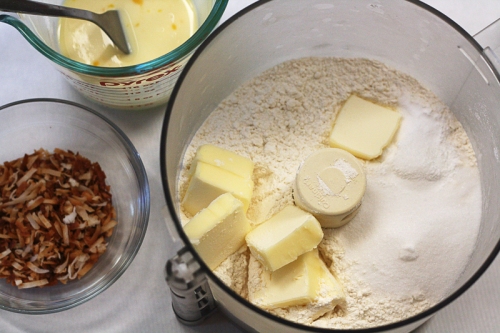
I used a basic buttermilk scone recipe, with a few tweaks. First, I decided to toast some coconut to add to the dough for a little extra kick of flavor. And second, I didn’t have the time or energy to rub the butter into the dough with my hands, and thought that in a pinch, a food processor might do the trick. Thankfully, I was right, and I plan to use this method again! It took a few quick seconds of pulsing the extra cold butter into the dry ingredients until the mixture was the sandy-texture that takes a while to achieve when you use your hands.
Quick Toasted Coconut Scones (makes 6)
1 1/2 cups Flour
2 Tbsp Sugar
2 1/4 tsp Baking Powder
1/4 tsp Baking Soda
1/2 tsp Salt
2 Tbsp Flaked Coconut, toasted
6 Tbsp Cold Butter
1 Egg Yolk (reseve egg white to brush onto scones before baking)
1/4 cup + 2 Tbsp Buttermilk
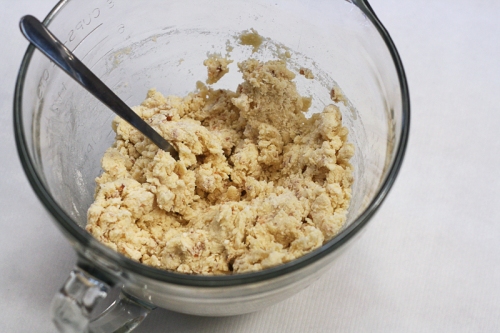
Preheat the oven to 425. Line a baking sheet with a silpat or parchment paper.
Place the flour, sugar, baking powder, baking soda, and salt in the food processor. Slice the butter into chunks and add that too. Pulse until mixture resembles course sand.
Whisk together the egg yolk and buttermilk.
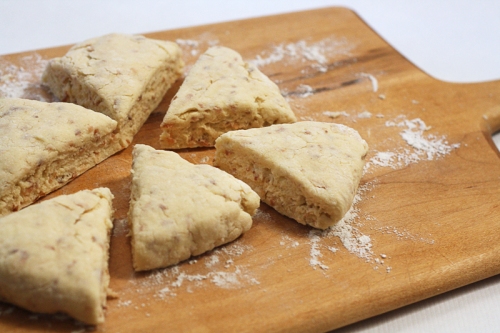
Combine the dry and wet ingredients, with the toasted coconut, and mix until everything has been incorporated. Using your hands, form the dough into a round, flat disk, about 3/4 -1 inch thick. Using a sharp knife, slice into 6 pieces and place on baking sheet. Brush a little of the reserved egg white on top of each piece.
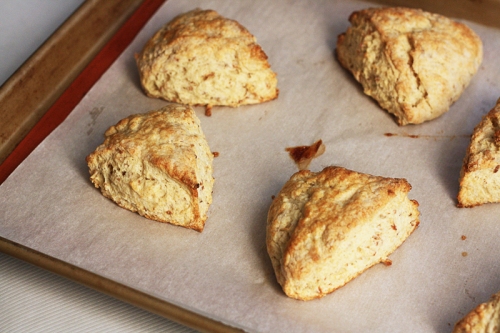
Bake 12-15 minutes or until slightly golden on top.
Scones should be eaten warm, but can be frozen and warmed or toasted later!
Filed under: breakfast, easy, few ingredients, finger food | 2 Comments
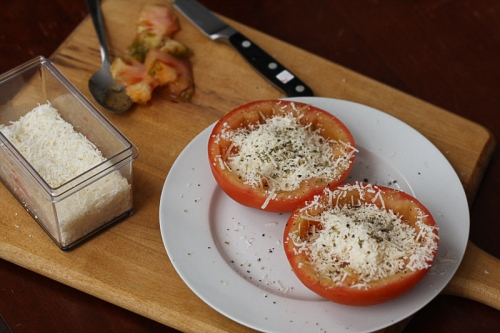
Roasted Parmesan Tomatoes
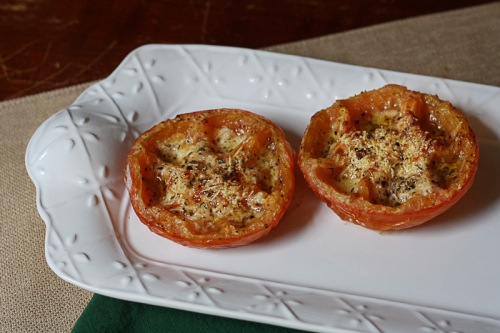
This is a great appetizer or basic dish to get the hang of because it can be adapted in so many ways. You could throw an egg in there under the cheese and make this for breakfast, or cook up a few and serve over spaghetti. In a bowl on top of grainy toast, next to herbed polenta, or on top of a pizza would all be delicious.
Roasted Parmesan Tomatoes
One large Tomato (any kind will do), halved so that it lays flat
1/2 cup grated Parmesan (use the good kind, don’t skimp!)
1 tsp Oregano or Basil
S&P
Olive Oil
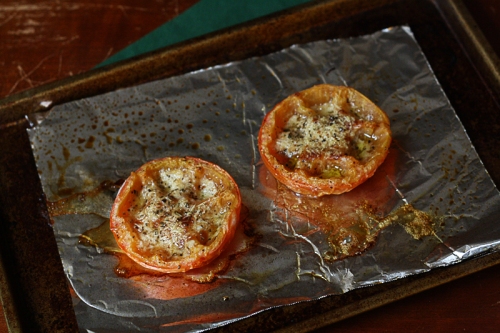
Preheat oven to 450 and line a baking sheet with aluminum foil.
Scoop out the seeds and some pulp from the tomatoes to create a shallow bowl. Split the parmesan and herbs evenly between the two halves.
Place two halves, cheese up, on the tin foil. Grind salt and pepper over top, and drizzle with olive oil.
Roast for 15 minutes or until cheese is melted and starting to brown. Allow to cool slightly before serving.
Filed under: easy, few ingredients, veggie | 1 Comment
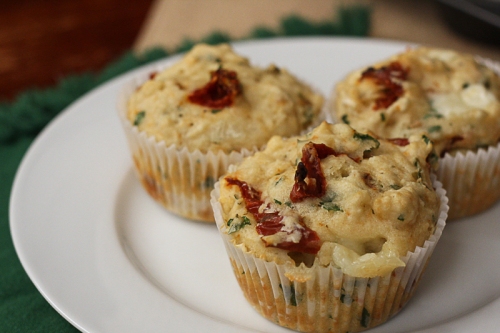
Caprese Muffins
These muffins are the third installment of work muffins – I really love bringing muffins into work, because I get to try out all sorts of new recipes that I’ve had an eye on, and brand new ones I’ve searched out as well. Coworkers seem appreciative too, which always helps! I’ve sort of made a personal promise to bring in new and unusual muffins (or at least try to steer away from blueberry and bran and those sort), to keep things interesting (for myself, mostly!).
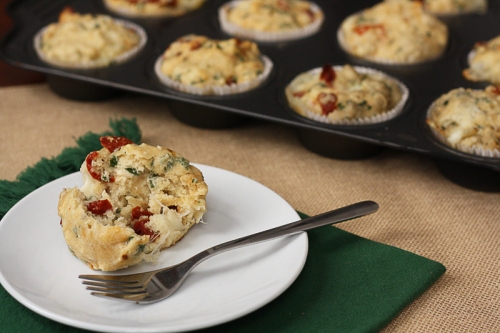
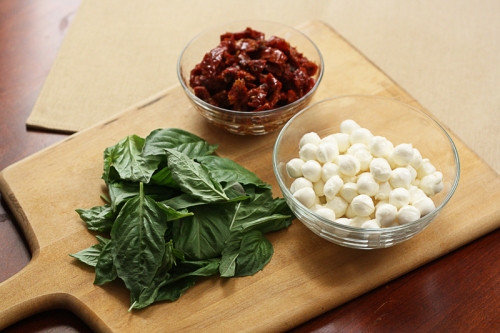
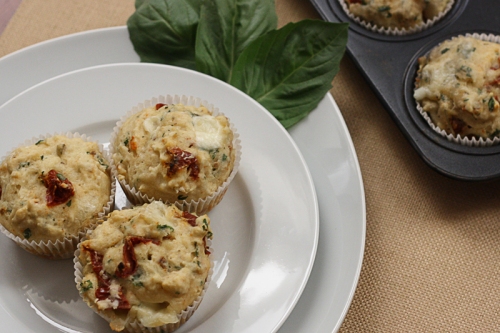
As you can see, these muffins are on the savory side and have a few non-traditional muffin ingredients. They’re based on the idea of a Caprese Salad, which is made with fresh mozzarella, basil, and tomatoes. The only tweak here is using sun dried tomatoes in oil instead of fresh tomatoes. I thought the fresh mozzarella pearls were perfect – although I cut them in half and then froze them so they would stand up to the heat a little better. I think that was a good move.
The muffins came out like savory moist biscuits. I love them! I could have eaten the whole batch.
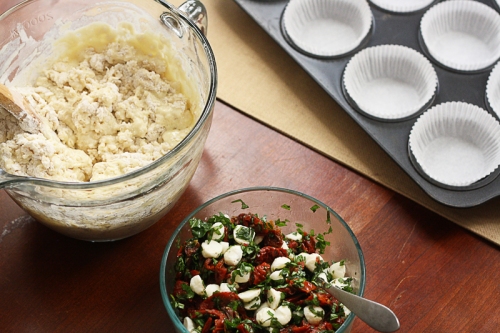
Caprese Muffins (from The Kitchenarian) (makes about 18 muffins)
1.5 cups Fresh Mozzarella
5 Tbsp Basil
1 cup Sun Dried Tomatoes
3 cups Flour
3 tsp Baking Powder
3/4 tsp Baking Soda
1.5 tsp Salt
1 egg, plus 1 egg white
1.5 cups Buttermilk
3 Tbsp Oil from Sun Dried Tomatos
1.5 Tbsp Olive Oil
A few hours ahead of time, cut your mozzarella into small cubes and freeze (or freeze, then cube! Whichever you find easier.)
When ready to bake, preheat oven to 375, and line muffin pan with muffin liners.
Finely chop the basil, and chop the sun dried tomatoes. In a small dish, mix with the frozen cheese cubes and return to the freezer while you make the batter.
Sift (or pulse in a food processor) together the flour, baking soda, baking powder, and salt. Set aside.
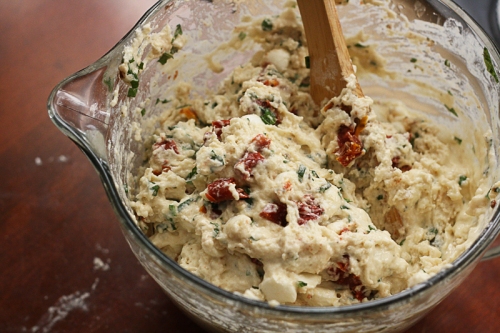
Whisk together the buttermilk, egg and egg white, and both oils. Create a well in the center of the dry ingredients and pour the wet mixture into it. Mix until just blended, then add the mozzarella mixture from the freezer.
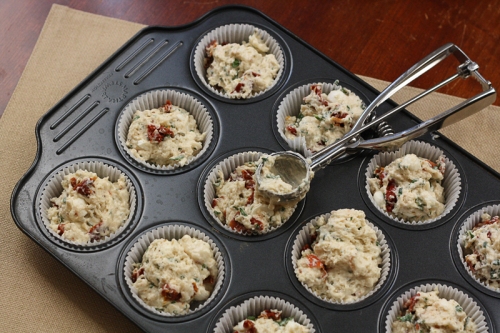
Fill the muffin liners almost full with the batter, bake 12-15 minutes or until the cheese is melty and a toothpick inserted in the center comes out clean.
Store leftover muffins in the fridge overnight.
Filed under: breakfast, snack, veggie | 1 Comment
Roasted Tofu
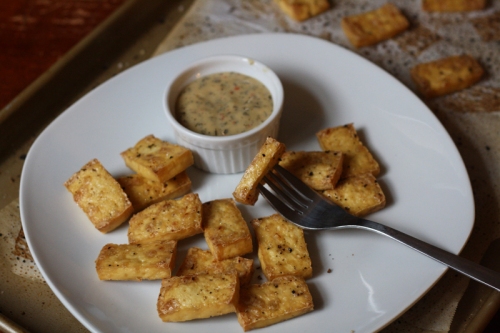
A new Buffalo Wild Wings opened up near where I live, and I stopped by with a friend on the way home from camping last weekend for lunch. I had forgotten what a guilty pleasure the food is there! You’d have thought I’d had enough of it after working there in college, but I ended up leaving with a couple bottles of sauce so I could have even more, at home. I stumbled across a recipe for roasted tofu with spicy thai flavor, and thought that if I stripped the flavor off, the roasted tofu would still be pretty yummy to dunk in the BWW Parmesan Garlic sauce. (It was.)
Overall, I think I’d make these again, in the place of chicken nuggets or tenders for a change. They were crispy and good for dipping.
Roasted Tofu (makes 2 servings)
1 pkg Extra Firm Tofu
S&P
Olive Oil
Preheat the oven to 450, and line a baking sheet with parchment paper.
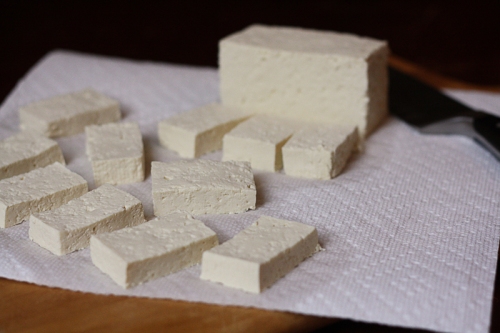
Drain the tofu and slice into 1-inch chunks, as pictured above. Using a few layers of paper towels, gently press the chunks to draw out a good portion of the moisture. Toss or brush lightly with olive oil, and lay out on the parchment paper. Sprinkle with freshly ground salt and pepper.
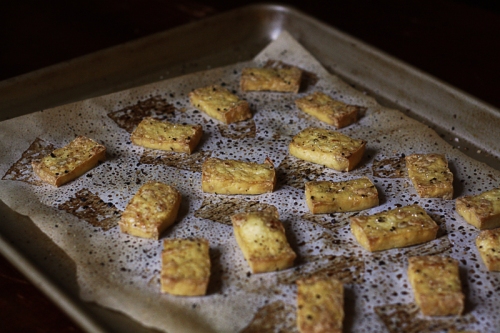
Roast for 15-17 minutes, until golden on the underside. Flip, and continue roasting for another 15-17 minutes until golden on all sides.
Serve warm with dipping sauce of your choice.
Filed under: easy, few ingredients, finger food, healthy | Leave a Comment
Chocolate Beer Truffles
Chocolate. And Beer. Two of my favorite things!
I made these truffles so long ago I barely remember what else is in them, but I remember them flying off the plate! I should probably make them again just to be sure…
Chocolate Beer Truffles (make approx 30 truffles) from Endless Simmer
9 oz Dark Chocolate, chopped into pieces (I think I used 75% cocoa)
1/2 cup Heavy Cream
3 Tbsp Beer (stout works well, I used Guiness)
Slivered Almonds (optional, not shown)
Cocoa Powder or Confectioners Sugar for dusting
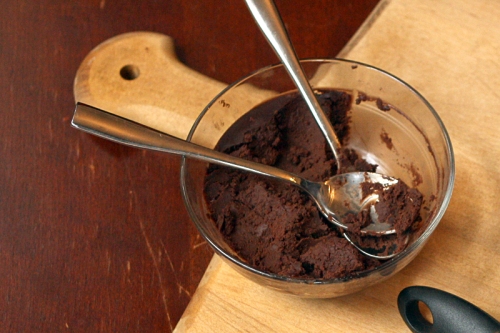
Place chocolate in heat proof bowl. In a small saucepan, heat heavy cream until just about to boil. Remove from heat and pour over chocolate – let sit for 3 minutes. After 3 minutes, the hot cream should have melted the chocolate and you should be able to stir together. Whisk until smooth, then set aside to cool for half an hour.
After the chocolate has cooled, gently stir in the beer (and almonds if you want), then transfer mixture to a flat, wide pan with a good amount of surface area. Refrigerate for 3-4 hours until set.
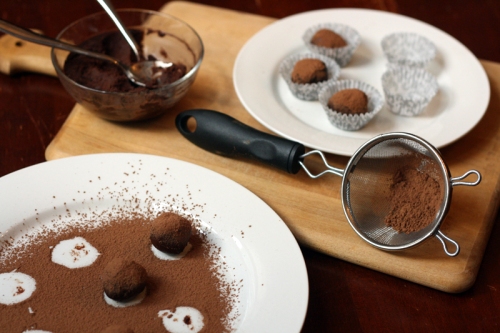
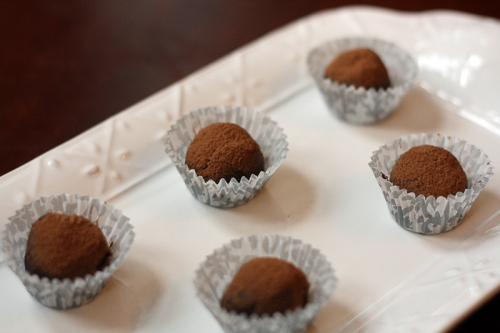
Using a melon baller or a small cookie dough scoop (or two spoons and your hands!), scoop rounds onto a plate or parchment paper. Lightly dust with cocoa or sugar, and move to mini cupcake liners to serve.
Filed under: dessert, few ingredients, finger food | 4 Comments
Spinach Stuffed Portobellas
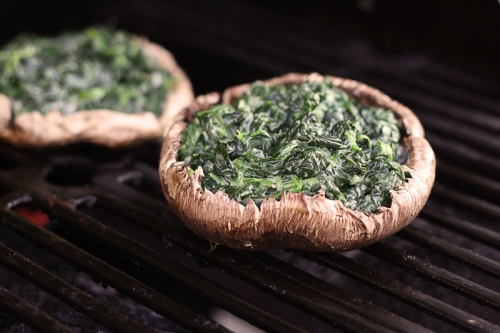
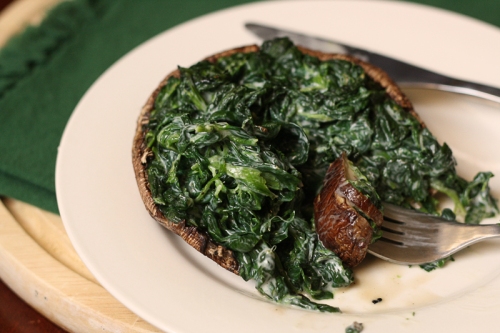
Here in Boston it’s been in the 90s for the last few days, so recipes for the grill have definitely been catching my eye. Anything to keep the heat out of the house. After the 4th of July and all the cook-outs and camp food this summer (involving all kinds of delicious meats and rich foods), this vegetarian dish really hit the spot.
I opted to use Laughing Cow Lite cheese, mostly because it’s what I had on hand, but also because it’s creamy and cheesy without being heavy. Goat cheese or cream cheese or even shredded cheddar would work as well.
Spinach Stuffed Portobellas (inspired by Serious Eats, feeds two as a small main or large side dish)
2 large Portobella Mushroom Caps
3 wedges Laughing Cow Cheese (or ~2.5oz other soft, spreadable cheese)
10 oz package frozen Spinach
S&P
Olive Oil
Crank up the grill to a medium-high flame.
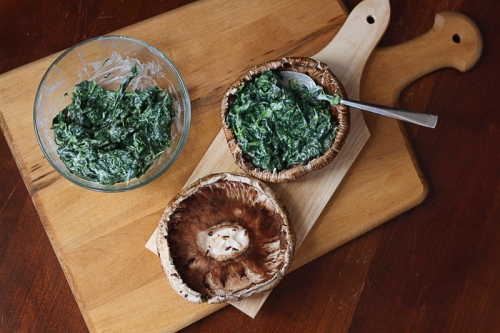
Wipe down the mushroom caps to remove excess dirt or debris (don’t ‘wash’ mushrooms, just use a wet paper towel to wipe down). Scrape out the gills and remove the stem if it’s there.
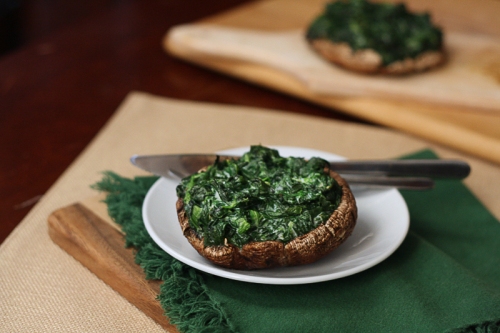
Defrost the spinach, and mix together with the cheese. Add salt and pepper to taste. Divide the spinach mixture in half and fill the mushroom caps.
Brush olive oil on the bottoms and sides of the mushrooms, and place stuffed side up on the grill. Cover and cook until the mushrooms are softened and the spinach is hot and bubbly, about 15-20 minutes.
Remove from the grill and serve while hot. Would be good alongside a simple pasta or with a poached egg on top.
Filed under: few ingredients, healthy, supper, veggie | 15 Comments
Chocolate Zucchini Muffins
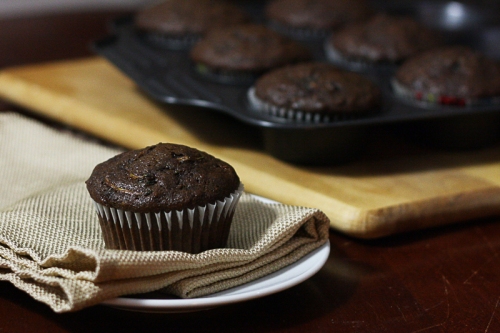
Mom sent me this recipe a few weeks ago but I didn’t have a chance to make it until now – glad I did, they turned out really well!
Chocolate Zucchini Muffins (makes 1 dozen regular, 24 mini muffins)
1 1/2 cups sugar
3/4 cup vegetable oil
2 tsp vanilla extract
3 eggs
1/3 cup plain yogurt
2 1/4 cups shredded zucchini
Zest of 1 lemon
Zest of ½ orange
1 cup whole wheat flour
1 ½ cups white flour
1/2 cup cocoa powder
11/2 tsp baking soda
1 tsp salt
1/2 tsp ground cinnamon
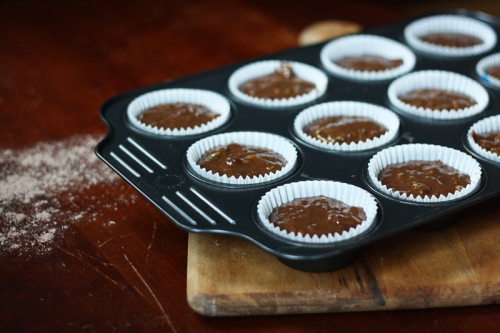
Preheat to 375, place muffin liners in muffin tins.
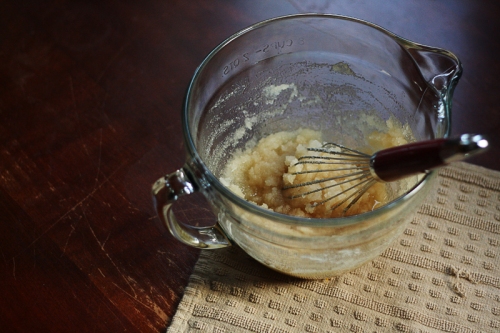
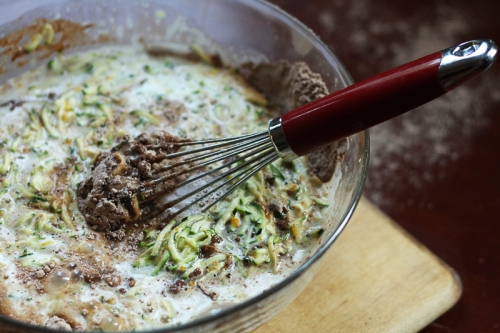
Whisk together the sugar, oil, and vanilla. Whisk in one egg at a time, until smooth, and then add the yogurt. Stir in the lemon and orange zest and the zucchini.
In a separate bowl, combine the flours, cocoa, baking soda, salt and cinnamon. Mix well.
Combine half the dry ingredients with the wet and mix thoroughly, then add the rest of the dry ingredients.
Fill muffin cups 3/4 of the way, and bake 15-20 minutes for full size muffins, and 10-15 minutes for mini muffins.
Filed under: dessert, finger food | 8 Comments


You must be logged in to post a comment.